
Video moire is one of the most stubborn artifacts in post-production. Whether you're editing screen recordings with visible pixel grids, interview footage where the talent wore a finely patterned shirt, or architectural walkthroughs capturing brick facades and window blinds, those shimmering rainbow bands and wavy lines can ruin an otherwise polished project. Unlike photo moire, video moire also flickers and shifts from frame to frame, making it significantly harder to fix.
DaVinci Resolve is the go-to NLE for many editors—partly because its free version is remarkably full-featured. But how well does it actually handle moire removal? In this guide, we'll walk through every practical method available inside Resolve, discuss their real-world limitations, and show you when an AI-powered approach delivers better results in less time. If you need an immediate fix, upload a still frame to our AI Moire Remover or use the dedicated Video Moire Remover for video-specific workflows.
Quick answer: DaVinci Resolve includes a Moire Reduction OFX plugin on the Color page that works well for mild fabric moire. Set Strength to 50 and increase gradually while monitoring detail loss. For screen recording moire or strong rainbow interference, the built-in tools struggle—exporting key frames and processing them through an AI moire remover produces noticeably cleaner results with far less effort.
What Causes Moire in Video?
Moire appears whenever two overlapping patterns of similar spatial frequency interfere with each other. In video, one of those patterns is always the camera sensor's pixel grid (or the Bayer color filter array). The second pattern comes from your subject—a digital screen's pixel matrix, the tight weave of a dress shirt, roof tiles viewed at a distance, or the fine lines of a building's facade.
Why Video Moire Is Harder Than Photo Moire
A single moire-affected photograph can be painstakingly retouched in Photoshop or cleaned up with AI in a few seconds. Video multiplies that problem by thousands of frames. Worse, video moire is temporal—it flickers, crawls, and shifts intensity as the camera or subject moves. A fix that looks perfect on frame 100 might create new artifacts on frame 105 if it isn't temporally consistent.
This temporal dimension is why traditional blur-based approaches often produce "swimming" artifacts in video that can be more distracting than the original moire.
Common Scenarios Where Video Moire Appears
- Interviews and talking heads: Talent wearing herringbone, houndstooth, or finely striped shirts is the classic trigger. The pattern interacts with the sensor as the person breathes and shifts.
- Screen recordings and product demos: Filming a monitor or TV introduces pixel-grid moire, especially at non-native resolutions. This is extremely common in tech review videos.
- Architectural and real estate footage: Brick walls, metal gratings, window blinds, and roofing tiles all produce geometric moire at certain camera distances and angles.
- Drone footage: Repetitive agricultural patterns, solar panel arrays, and building facades shot from above often show moire.
Method 1: DaVinci Resolve's Moire Reduction OFX
DaVinci Resolve ships with a dedicated Moire Reduction effect in its OpenFX library. This is the most straightforward path to removing moire from video inside Resolve, and it's available in both the free and Studio versions.
Step-by-Step Instructions
Step 1: Import Footage and Build Your Timeline
Drag your moire-affected clip onto the timeline in the Edit page. Make sure your timeline resolution and frame rate match the source footage—mismatches can actually introduce additional moire-like aliasing.
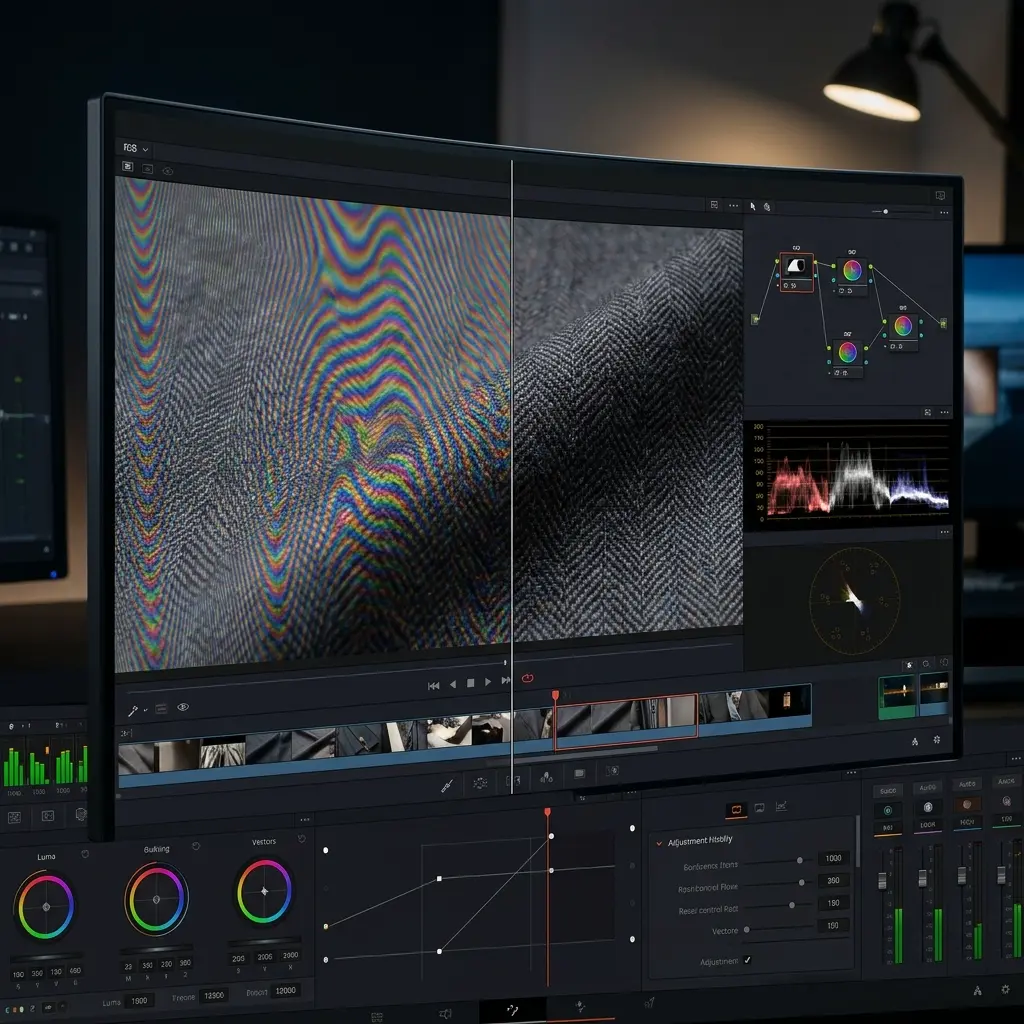
Step 2: Switch to the Color Page
Press Shift + 6 or click the Color page icon at the bottom of the screen. This is where all node-based color grading and effects work happens in DaVinci Resolve.
Step 3: Open the OpenFX Panel
In the top-right corner of the Color page, click the OpenFX button (it may also be labeled Effects Library depending on your version). This opens the effects browser.
Step 4: Search for Moire Reduction
In the search bar at the top of the OpenFX panel, type "Moire". You should see ResolveFX Moire Reduction (or simply Moire Reduction) in the results. If you don't see it, make sure you're on a serial node in the node graph—some OFX effects won't appear when applied to parallel nodes.
Step 5: Apply the Effect
Drag the Moire Reduction effect onto your active node in the node graph. A settings panel will appear on the right side.
Step 6: Adjust Parameters
The key parameters are:
- Strength: Controls how aggressively the filter targets moire. Start at 50 and increase in increments of 10 while watching the preview. Going above 80 usually introduces visible softening.
- Radius: Determines the size of the area analyzed for moire patterns. A larger radius catches lower-frequency moire but increases processing time and blur risk. Start with the default and increase only if moire persists.
- Edge Sensitivity (if available): Helps the filter distinguish between genuine image edges and moire patterns. Higher values preserve more edges but may leave some moire intact.
Step 7: Preview and Fine-Tune
Scrub through the clip, paying special attention to areas where the moire is strongest. Check both moire-heavy and moire-free sections of the frame—you want to ensure the filter isn't softening areas that don't need it. Use the bypass button on the node to toggle the effect on and off for comparison.
Pros and Cons of the OFX Approach
Pros:
- Built directly into DaVinci Resolve (available in the free version)
- Applies to the full clip with temporal consistency
- Non-destructive—works within the node pipeline so you can adjust or remove it anytime
- Fast to apply for a quick first pass
Cons:
- Can blur fine details, especially at higher Strength values
- Limited effectiveness on strong screen moire and rainbow interference
- Processing entire long-form video adds significant render time
- No masking built into the effect—you need a separate qualifier node to isolate the moire area
Method 2: Manual Approach with Blur + Blend Modes
For editors who need more precise control, DaVinci Resolve's node graph allows a manual moire reduction technique similar to frequency separation in Photoshop.
The Technique
- Create a parallel node from your corrector node (right-click > Add Node > Add Parallel)
- Apply a Gaussian Blur to the parallel node. Start with a radius that just begins to dissolve the moire pattern—typically between 3 and 8 pixels.
- Use the HSL Qualifier on the parallel node to isolate the color range where moire is visible. Moire often shows up as unwanted color shifts in specific hue ranges.
- Adjust the node's key output so only the moire-affected areas receive the blur treatment.
- Blend the parallel node back using the composite mode controls. Experiment with Color mode blending, which replaces the moire's false colors while preserving luminance detail.
When This Makes Sense
This manual method gives you surgical control over exactly which parts of the frame are affected. It's worth the extra effort when:
- The moire is confined to a small area (like a shirt) and you want the rest of the frame untouched
- The OFX Moire Reduction is too aggressive even at low settings
- You need to target specific color artifacts without affecting luminance
However, this approach is significantly more complex and time-consuming. For most editors, the OFX plugin is sufficient as a starting point, and the manual method should be reserved for hero shots or critical deliverables.
Method 3: AI Moire Removal (Frame-by-Frame)
When DaVinci Resolve's built-in tools fall short—especially with screen recording moire or heavily patterned footage—an AI-based workflow can produce dramatically better results. The approach involves exporting problem frames, processing them through a trained neural network, and re-importing the cleaned frames.
The Workflow
- Identify problem sections in your timeline. Mark in/out points around the worst moire segments.
- Export frames as still images. In DaVinci Resolve, go to the Color page, position the playhead on a moire-affected frame, and right-click the viewer > Grab Still. For batch export, use File > Deliver with the "Individual Frames" output format (TIFF or PNG for lossless quality).
- Process through AI tools. Upload the exported frames to our Video Moire Remover for batch processing, or use the AI Moire Remover for individual frames. The AI model is specifically trained on moire patterns and can distinguish moire artifacts from genuine image detail far more accurately than frequency-based blur filters.
- Re-import cleaned frames. Bring the processed images back into DaVinci Resolve and composite them over the original clip using a Fusion composition or a simple layer swap.
Best For
- Thumbnails and key frames where visual quality is paramount
- Screen recordings where pixel-grid moire resists traditional blur approaches
- Still exports from video (e.g., blog post screenshots, social media images pulled from footage)
- Short segments where frame-by-frame processing is practical
For a comprehensive guide on dealing with screen-specific moire, see our article on how to fix moire patterns.
Comparison: DaVinci Resolve Moire Removal Methods
| Aspect | OFX Moire Reduction | Manual Blur + Qualifier | AI Frame Extraction |
|---|---|---|---|
| Speed | Fast (drag & drop) | Slow (15-30 min setup) | Medium (export + process + import) |
| Quality | Good for mild moire | Good with expertise | Excellent for all moire types |
| Difficulty | Beginner | Advanced | Beginner |
| Detail Preservation | Moderate (can blur) | High (targeted) | High (AI-aware) |
| Best For | Fabric moire in interviews | Hero shots, selective fixes | Screen moire, thumbnails |
| Temporal Consistency | Good | Good | Requires frame matching |
| Cost | Free (included) | Free (included) | Free tier available |
The right choice depends on your specific situation. For a quick fix on fabric moire, the OFX plugin is the pragmatic choice. For screen recording moire or when quality is non-negotiable, the AI approach outperforms traditional methods.
Tips for Preventing Video Moire During Production
The best moire removal happens before you press record. These production techniques can eliminate or drastically reduce moire at the source:
- Shoot at a wider aperture: A shallow depth of field naturally softens repetitive patterns on non-focal-plane subjects. If the moire-producing pattern isn't your primary subject, opening up even one stop can help.
- Apply slight defocus to problematic patterns: If you can't avoid a moire-triggering pattern (like a screen you're filming), a tiny focus adjustment that softens the pattern's sharp edges can prevent moire without making the subject look obviously out of focus.
- Change the camera angle: Even a 5-10 degree shift in camera angle relative to the pattern can break the frequency alignment that causes moire. This is especially effective with architectural subjects.
- Increase camera distance: Moving further from the pattern changes the spatial frequency relationship. Combined with a longer focal length, this can eliminate moire while maintaining the same framing.
- Use an optical low-pass filter (OLPF): Some cinema cameras have removable OLPFs. If you regularly shoot moire-prone subjects, consider using one. Many modern cameras omit the OLPF for sharper images, but this makes them more susceptible to moire.
- Avoid problematic wardrobe: For interviews and on-camera talent, brief your subjects to avoid finely patterned fabrics—herringbone, tight stripes, and small checks are the worst offenders.
Frequently Asked Questions
Does the free version of DaVinci Resolve have moire reduction?
Yes. The Moire Reduction OFX effect is included in the free version of DaVinci Resolve. You don't need the Studio version to access it. The free version's Color page and node graph are fully functional for moire reduction workflows, though render times may be longer without GPU acceleration features exclusive to Studio.
Can I remove moire from already-rendered video?
Absolutely. DaVinci Resolve's moire reduction works on any video file you import, regardless of whether it was originally shot in RAW, ProRes, H.264, or any other format. The OFX Moire Reduction effect processes the decoded frames, so the source format doesn't matter. That said, heavily compressed footage (low-bitrate H.264) gives the filter less information to work with, which can limit results.
How do I fix moire in screen recordings?
Screen recording moire—the rainbow patterns that appear when filming a monitor—is one of the hardest types to fix in any NLE. In DaVinci Resolve, the OFX Moire Reduction can help with mild cases, but strong screen moire often persists. For best results, export the affected frames and process them through our Screen Moire Remover, which uses AI trained specifically on screen-capture moire patterns. For future recordings, try filming at the monitor's native resolution or using a capture card instead of pointing a camera at the screen.
Is DaVinci Resolve better than Premiere Pro for moire removal?
DaVinci Resolve has a dedicated Moire Reduction OFX effect, which gives it an edge over Premiere Pro for this specific task. Premiere Pro doesn't ship with a moire-specific filter, so editors typically rely on third-party plugins or manual blur techniques. Resolve's node-based Color page also provides a more flexible pipeline for combining moire reduction with targeted qualifiers and masks. Both applications can produce acceptable results, but Resolve's built-in toolset is more purpose-built for this problem.
Can AI remove moire from video?
AI can remove moire from individual video frames with excellent quality—often surpassing what traditional frequency-based filters achieve. The current practical approach is frame extraction: export moire-affected frames from your NLE, process them through an AI model like our AI Moire Remover, and composite the cleaned frames back into your timeline. For short segments, thumbnails, and hero shots, this workflow delivers the best results available. Full real-time AI video moire removal is emerging but not yet widely available in mainstream NLEs.
What's the difference between moire and aliasing in video?
Moire and aliasing are related but distinct artifacts. Aliasing occurs when fine detail exceeds the camera sensor's sampling resolution, producing jagged edges or staircase patterns on diagonal lines. Moire is a specific type of aliasing where two overlapping regular patterns create a visible interference pattern—the characteristic wavy bands or rainbow colors. In DaVinci Resolve, the Moire Reduction OFX targets moire specifically, while general anti-aliasing would require a different approach such as supersampling or post-render smoothing.
Wrapping Up: Choosing the Right DaVinci Resolve Moire Removal Approach
DaVinci Resolve provides solid built-in tools for video moire reduction, especially for fabric moire in interview and event footage. The OFX Moire Reduction plugin is a sensible first stop—quick to apply, available in the free version, and effective for mild to moderate cases. For editors who need more precision, the manual blur-and-qualifier node setup offers surgical control at the cost of additional complexity.
Where Resolve's tools hit their ceiling—screen recording moire, strong rainbow interference, or situations where any detail loss is unacceptable—AI-powered moire removal fills the gap. Try our Video Moire Remover for batch frame processing or the AI Moire Remover for individual stills. The combination of DaVinci Resolve's timeline management with AI-cleaned frames gives you the best of both worlds: professional NLE control and state-of-the-art artifact removal.
